Migrating a live website from DreamHost to Crazy Domains Web Hosting can be done smoothly by following these step-by-step instructions. This guide will help you transfer your website files, databases, and change DNS settings to point towards Crazy Domains Nameserver and IP Address.
These insights will help for migrating a website built using DreamHost WordPress Basic Plan, VPS WordPress Installation. These insights are for Crazy Domains Web Hosting (Economy – Premium or Ultimate package).
Video Tutorial for Migrating a Live Website from DreamHost to Crazy Domains
Step 1: Backup Your DreamHost Website
Before starting the migration, back up all your website files and databases from DreamHost.
Files: Use an FTP client (like FileZilla) for faster download, or DreamHost’s Website Manager control panel to download all your website files to your local computer.
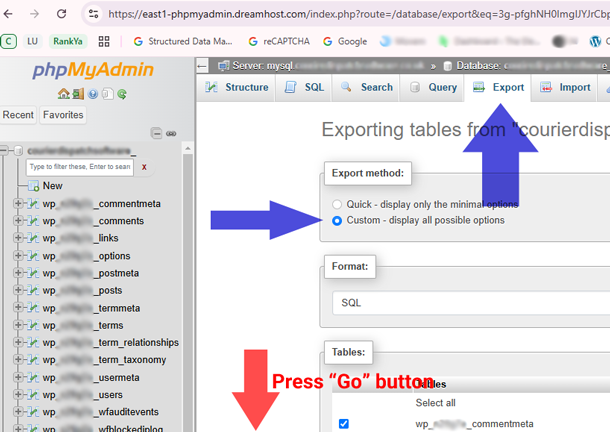
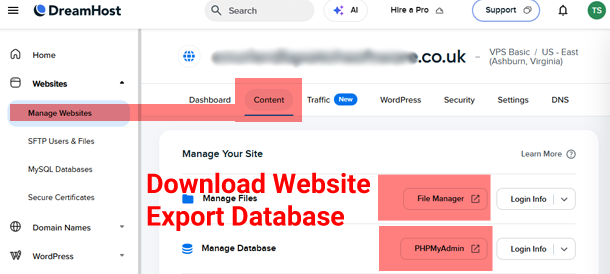 Database: Export your database using phpMyAdmin Export option. Save the .SQL file to your local computer.
Step 2: Sign Up for Crazy Domains Hosting
If you haven’t already, sign up for a hosting plan with Crazy Domains. Visit Crazy Domains and choose a plan that suits your business website’s needs.
We recommend Linux Hosting 1 Year Package for Australian Web Hosting if you’re tight on budget (Crazy Domains Economy Linux Web Hosting package offers you FREE AutoSSL for the 1st year so you need not purchase Advanced SSL Certificate) (Premium & Ultimate packages offers free SSL by default).
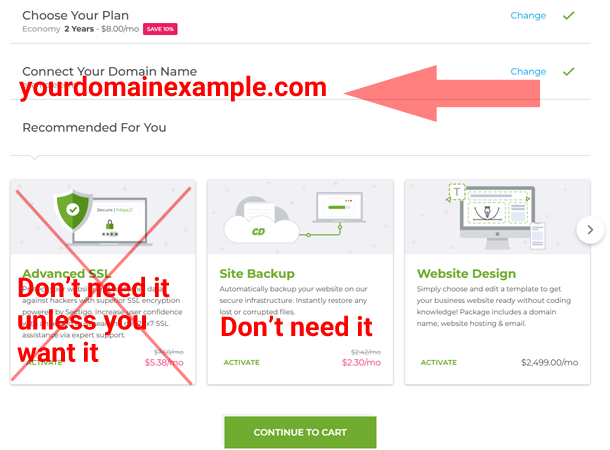 Complete the registration process and Crazy Domains will setup your new Web Hosting Account and email you confirmation of purchase and login details.
Step 3: Upload Your Website Files to Crazy Domains Web Hosting
Once your Crazy Domains account is set up, you’ll need to upload your website content (folders files images etc.) to your new hosting environment.
Log in to your Crazy Domains account.

Use the cPanel File Manager, or an FTP client to upload your entire website content to the public_html directory (or the appropriate sub-directory for your website).
Step 4: Import Your Database
You’ll need to import your .sql file in to Crazy Domains Database, to be able to do that follow these steps:
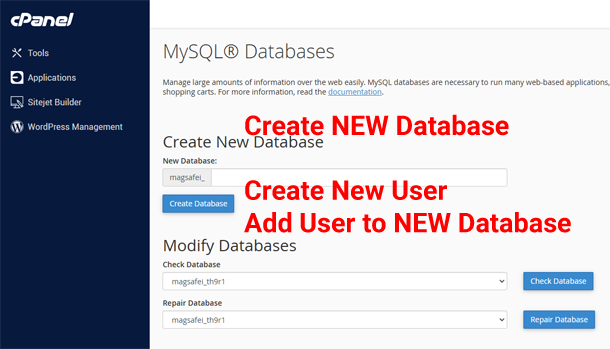
- Find menu for ‘MySQL Databases’ in Crazy Domains cPanel.
Create a new database and user, and assign the user to the database.
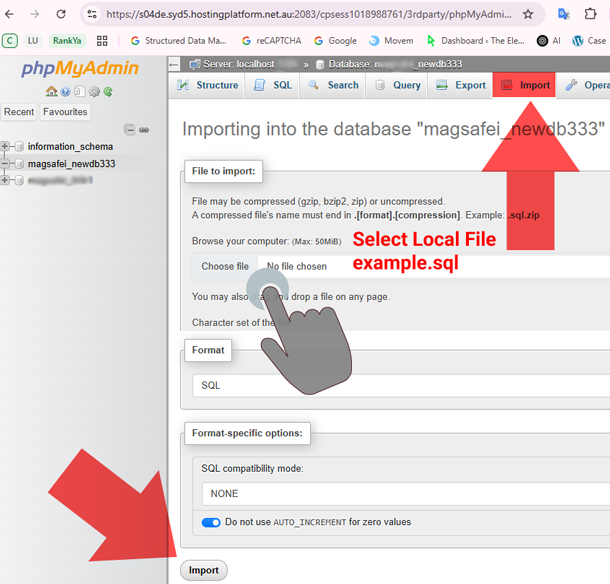
Now that your database is ready. From your new cPanel Login to “phpmyadmin” and find your new database you’ve just created. Press on ‘Import’ tab. Choose .SQL file from your computer and begin importing the .SQL file into your new database.
Step 5: Update Configuration Files
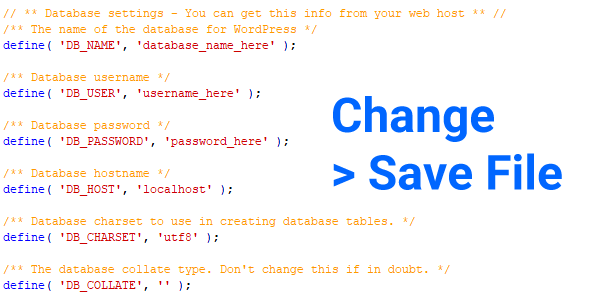
If your website uses a configuration file (e.g., wp-config.php for WordPress), update it with the new database details.
- Locate the configuration file in your website’s root directory (File Manager >
public_html> wp-config.php > Right Click > Edit). - Update the database name, username, password (to match the new database name you’ve created).
Step 6: Update DNS Settings
To point your domain from DreamHost towards Crazy Domains, you’ll need to update your DNS settings.
- Locate Domain DNS Settings in your DreamHost account (if your domain is registered with another domain registrar, login to their control panel to update DNS settings).
- Update the nameservers to the ones provided by Crazy Domains (ns1.syrahost.com AND ns2.syrahost.com for Linux Web Hosting)
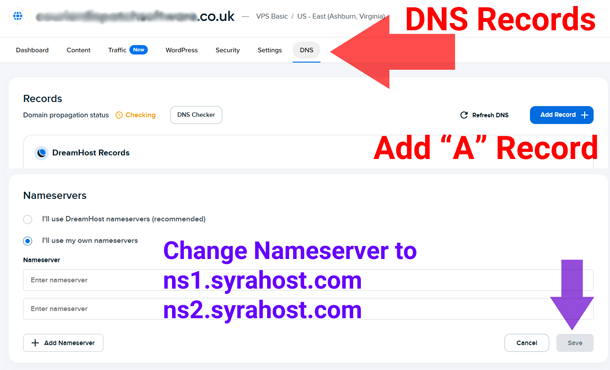 You’ll need to create two A Records
- Add @ “A Record” and insert the IP Address to match Crazy Domains Web Hosting IP (can be found in cPanel left-hand side menu).
- Add www “A Record” and IP Address to match Crazy Domains Web Hosting IP.
Step 7: Test Your Website on Crazy Domains Server
Before making your website live on Crazy Domains, test it to ensure everything is working correctly.
- There are many different ways you can test your new web host. Basic example would be: create a new file
index.htmlinside public_html folder. This newindex.htmlfile can contain a brief message ‘Website is under maintenance’. Then, you can create another folder and call it ‘BACKUPS’ and place everything butindex.htmlinside that backup folder. - Visit
yourexampledomain.com/index.htmlif you can see this file, all is working, if you can’t see the file, troubleshoot further. - You must check all pages, forms, and functionalities to ensure they work as expected.
- Once you’ve confirmed that everything is working correctly, you can now make your website live on Crazy Domains.
- Monitor your website for any issues after going live.
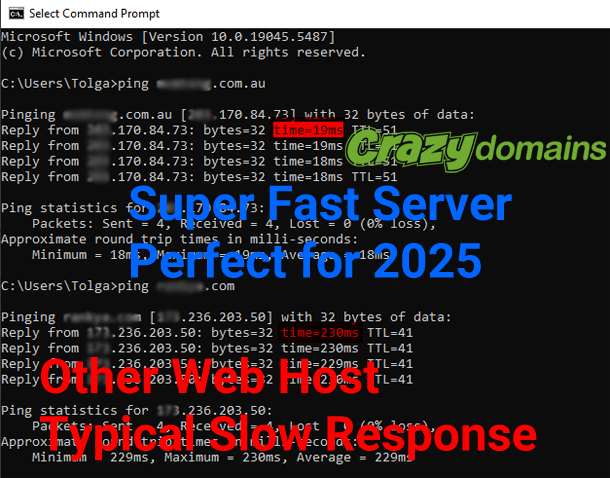
RankYa Tip: because DNS changes can take up to 24 hours to propagate throughout the internet, to speed up the process simply use Web Proxy servers to request your website. You can also use Windows CMD prompt to ping example.com
Step 8: Cancel DreamHost Plan (WordPress Hosting VPS Hosting) (Optional)
If you’re satisfied with the migration and no longer need your old DreamHost web hosting, you can cancel it.
- Ensure you have all necessary backups before canceling.
- Login to DreamHost Account and find the web hosting settings to cancel web hosting plan. Billing page usually is the place to cancel your plan.
- Do NOT delete domain name if registered through DreamHost. Although you can transfer domain name registrar to be Crazy Domains, you can also keep the domain name registered through DreamHost).

Why Should You Switch to Crazy Domains Web Hosting?
- Competitive prices (Economy Web Hosting Plan is a great deal giving you all the tools you need and is less than $70 per-year)
- FREE SSL
- Faster Servers (19ms per-packet?) (must have in 2025 for better website user-experience, and Google rankings)
- Better Customer Support
- Global Content Delivery Network (CDN) (includes Web Servers located in Australia Datacenter)
